Saturday, May 19, 2012

Carrot Soup

For the past week we’ve had beautiful, warm weather, but today the weather took a different turn. It started to rain last night and it has been raining off and on for most of the day today. With the temperature being only around 50 degrees, I thought that tonight would be a good night to make some soup.

A few years ago when I went to a friend’s house for dinner, she made a wonderful carrot soup that she served over some couscous. It was so good that I decided to try to make it tonight. The carrot soup recipe came from one of the original Moosewood cookbooks, and I was lucky to find the recipe online and I just altered a few things and cut the original recipe in half because I was just cooking for myself tonight.

Ingredients:
2 1/2 cups vegetable stock
1 pound carrots, peeled and chopped into about 1/2- to 1-inch pieces.
1/2 to 1 teaspoon of salt
1/2 tablespoon butter
1 small onion, chopped
1 clove garlic, minced
1/4 cup chopped cashews
1 teaspoon each of thyme, basil, and ginger
Salt and pepper to taste
1 cup prepared couscous
Optional additions: sour cream, plain yogurt, heavy cream

Directions:
1. Put stock, carrots, and salt in a pot and bring to a boil. Cover and reduce heat and simmer for 15 to 20 minutes. When you can pierce the carrots with a fork, turn off the heat and let it cool.
2. In a separate pan, saute the onions, garlic, cashews in butter until the onions soften. Add thyme, basil, and ginger and saute for a few more minutes. Add to pot with carrots and stock.
3. Prepare the couscous according to the package directions and set aside.
4. Puree the soup in a blender until you reach your desired consistency. You might have to work in batches. Add the pureed soup back to the pot and gently reheat on low. Add salt and pepper to taste.
5. Serve the soup on top of couscous.
6. Add any toppings you'd like or stir in some heavy cream. I chose sour cream.

The picture shows a pretty small bowl of soup, but, trust me, it was really filling and it definitely hit the spot on a chilly evening!

Sunday, March 11, 2012

Raspberry Vinaigrette

In previous posts I talked about how I wanted to try to cook and make more things from scratch. Buying things straight from the grocery store is a wonderful convenience, and it is a convenience that I have indulged in and will continue to indulge in. But every now and then I want to control the ingredients that go into my food. Unless you buy foods that are all natural or organic you often put things into your body that you don't really need, things like high fructose corn syrup or all of those ingredients that you can't pronounce. I've realized that many of the things I buy are easier to make from scratch, and in some cases it's also cheaper. So far I've been successful with making my own croutons and I've had one success with making my own lentil vegetable soup. Tonight I tried to make my own raspberry vinaigrette for a spinach salad. I have to say that it was a success.

Ingredients:
3/4 cup (1/2 pint container) fresh raspberries
1 tablespoon apple cider vinegar
1 teaspoon Dijon mustard
2 tablespoons honey
pinch of salt
pinch of pepper
3-4 tablespoons olive oil

Directions:
Put the raspberries, apple cider vinegar, Dijon mustard, honey, salt, and pepper in a blender, food, processor, or mini-chopper and puree. Stream in olive oil and continue pureeing until smooth. If you don't have the equipment to puree the vinaigrette, put the raspberries in a bowl and mash with a fork, then whisk in the other ingredients. Adjust the seasonings as you see fit. I prefer my dressing on the sweet side, so I added more honey. If you prefer tangy dressing, cut back on the honey.


I put the vinaigrette on a spinach salad with toasted walnuts and goat cheese. It was delicious.

Sunday, February 19, 2012

Spicebox French Toast

Recently one of my really good friends has been talking about a new whisky she discovered, Spicebox Whisky. I know of several brands of whisky but I have never heard of Spicebox, so naturally I was curious. I was fortunate to find it in a local liquor store, so I bought a bottle and had a sip (or several) later that evening. I was so happy that I decided to try it, because it is so delicious! It has a bit of sweetness to it, and it is incredibly smooth.

As the name suggests, this is a spiced whisky. There are a variety of spices in it, but what really comes through is vanilla. As I was drinking it, I suddenly realized that it would taste great in French toast. I've made French toast with rum before, but I just knew that the vanilla notes in the Spicebox would really enhance the French toast. I was so happy with how it turned out.

Since I made the French toast just for myself, I just threw the ingredients together for one portion. But here is a recipe that gives some measurements if you're cooking for a larger crowd. This makes about 4 servings.

Ingredients:
4 eggs
2/3 cup milk
1/4 cup Spicebox Whisky
salt, just a pinch
8 slices of bread
butter
maple syrup

Directions:
1. Whisk the eggs, milk, whisky, and salt.
2. Dip the bread into the egg mixture and cook on a buttered skillet or griddle pan.
3. Top with maple syrup and any other toppings of your choice.

I didn't even remember to take a picture, but I can say that it looked good and it tasted delicious!

Lentil Vegetable Soup

One day at work a few weeks ago we had the unfortunate luck of losing water in our building. Apparently a water main broke and affected most of the office park. People in other companies seemed to go home once that happened, and considering the problem lasted for four hours, that was probably a good choice. We, however and foolishly, continued to keep working. People who had to use the restroom had two choices: they could either continue to use our broken bathrooms or they could drive to a gas station, grocery store, coffee shop, or home if they lived close enough. A co-worker and I decided to go to her house to both use the bathroom and to have lunch.

For lunch we had lentil and vegetable soup. The soup she made came straight out of a can but it was delicious, and naturally I started to wonder if it was something that I could make from scratch. I found a recipe in Mark Bittman's How to Cook Everything Vegetarian, and, with a few adjustments, I made a batch. This soup yields about 4-6 servings.

Ingredients:
olive oil
1 onion, chopped
1 clove garlic, minced
1 cup dried lentils, rinsed
1 bay leaf
1 carrot, diced
1 celery stalk, diced
6 cups low sodium vegetable stock
1 can diced tomatoes, drained
1/4 teaspoon thyme
1/4 teaspoon cumin
salt
pepper

Directions:
1. Coat bottom of large soup or stock pot with olive oil and saute onions and garlic over medium heat until they soften. About 3 or 5 minutes.
2. Add lentils, bay leaf, carrot, celery, vegetable stock, tomatoes, and seasonings. Bring to a boil, then turn heat to low and cook, stirring occasionally, until lentils are tender, about 30 minutes.
3. Remove bay leaf and serve.


The soup had a brownish-greenish color when I finished cooking it, but, trust me, it was very good. I was also surprised at how filling it was. I have a fast metabolism and I'm usually hungry again after a few hours, but this soup kept me filled up for a long time.

Sunday, October 23, 2011

Homemade Croutons

After several failures in the kitchen a few weeks ago, I was determined to get my groove back. I was also determined to eat a little better after several meals of takeout or frozen foods. Last night I made pork chops marinated in soy sauce, kecap manis (a sweet Indonesian soy sauce), and garlic. For my side, I had sweet potatoes that I roasted with olive oil, salt, and pepper. And because I've been needing more vegetables, I made a simple salad.

I've had croutons on my shopping list for a long time. Well, it's been on the shopping list in my head for several weeks, but I just kept forgetting to write it down. So after another shopping trip and after forgetting to buy them once again, I decided to try to make my own. I've seen people do it on cooking shows on TV and it looks so simple so I thought why not. Most of the "recipes" I've seen call for day-old french bread, which I didn't have. Instead, all I had was regular white bread. The bread is called "Premium Italian" from Oroweat and I'm not sure what makes it Italian. The only major differences is that the slices are a bit thicker than regular sandwich bread. Either way all you need is some kind of thick-sliced white bread.

Ingredients:
White bread, diced in cubes
Butter
Seasonings of your choice

Directions:
1. Melt the butter in a pan on low or medium-low heat.
2. When the butter is melted, add the bread and toss until the bread is coated with butter.
3. Sprinkle seasonings over the butter and toss to coat.
4. Cook, tossing occasionally, until bread is toasted on the outside

For my croutons, I simply used garlic powder and parsley, but you can add any seasonings you want. You could probably add a little bit of salt, pepper, oregano, and/or thyme. You can even add some grated Parmesan cheese. These croutons turned out great. They were flavorful and had the perfect texture. Sometimes the problem with boxed croutons from the store is that they are so hard, I'm often afraid that I might break a tooth while eating them. These homemade croutons were perfectly crunchy. Now that I know how simple it is to make my own, I doubt I'll ever buy a box again!

Sunday, September 11, 2011

Corn and Black Bean Salsa

This past Friday was my day to bring in treats for our office food club. My partner for the day wanted to bring in nachos, so I decided to bring in some guacamole and salsas. I brought in some premade salsas, but I also decided to try out a new recipe and make some homemade Corn and Black Bean Salsa. It was the first time I made it, but it turned out to be a success.

Ingredients:

1 can of whole kernel corn, drained
1 can of black beans, drained and rinsed
1 small red onion, finely diced
3 green onions, finely sliced
2 cloves of garlic, minced
1 bunch of cilantro, finely chopped
2 jalapenos, finely chopped (seeds removed if you want to tone down the heat)
3 small tomatoes, seeded and diced
juice from half a lime
salt, pepper, cumin or any other spices to taste

Directions: 1. Toss everything together in a bowl and mix well.

Notes:
It's pretty hard to screw up this recipe. Simply taste the salsa and adjust the ingredients or seasonings however you wish. I seeded the jalapenos to tone down the heat because not everyone in the food club likes really spicy food. I think if I were to make this again for myself, I would keep some of the seeds or I would try a different pepper like a Serrano which has a bit more heat to it.

Corn and Black Bean Salsa

Saturday, March 19, 2011

Happy Birthday to Me!

My birthday was a few weeks ago, and I always like to buy something nice for myself. I'm not your typical girl. I don't need shoes or clothes or jewelry or anything like that. What I want is a nice bottle of cognac. That's all it takes to make me happy.

Tuesday, March 15, 2011

Turkey Burger with HorseMayo

I love a good burger, but every now and then I want something a little leaner and healthier. So one day I decided to try making a turkey burger. When I looked online for ideas, I saw a lot of mixed opinions. Because turkey is so lean, people often complain that turkey burgers get really dry. So to compensate, they tend to stuff the burger with all kinds of things—onions, garlic, mushrooms, zucchini, eggs, breadcrumbs—but that just seemed like it was too much. Every now and then I like a little something extra on my burger, but not necessarily in my burger, and for the most part I like to make burgers that are simple and straightforward. When I make my own turkey burgers, I don't add a lot of ingredients and so far I haven't had a problem with dry burgers.

Ingredients:
1/4 pound ground turkey (lean is OK, but stay away from extra lean)
1 teaspoon garlic powder
1 teaspoon onion powder
freshly ground black pepper
splash of soy sauce (this will give it some moisture and a bit of salt)
hamburger buns
toppings and condiments of your choice

Directions:
1. Lightly oil a grill pan and set on medium heat.

2. Mix all ingredients together so that everything is combined. There is no need to overwork the turkey. Shape into a patty and toss it on the grill pan. Cook for about 4 minutes on each side. Put patty on bun and top with your favorite toppings.

"HorseMayo"
Ingredients:
2 teaspoons mayo
1 teaspoon horseradish sauce

Directions:
1. Mix mayo and horseradish sauce together. That's it!

Sunday, March 6, 2011

Dijon Mustard Marinade

When I make this marinade I typically use it for grilled chicken breasts. If you let it marinade for a few hours or even overnight, the chicken really soaks up the flavor. When I make this I usually just eyeball the amounts of the ingredients and have never officially measured anything. But I've provided some rough measurements here.

Ingredients:
2 tablespoons Dijon mustard
2 tablespoons red wine vinegar
1/4 olive oil
1 clove garlic, finely chopped
1 teaspoon dried thyme
salt
pepper

Marinade Directions:
1. Put the mustard, red wine vinegar, and olive oil in a medium bowl and mix well with a fork or whisk. Add garlic, thyme, salt, and pepper and mix again.

For grilled chicken breasts:
1. Add the chicken to the bowl and toss the chicken in the marinade so that it is evenly coated. I poke the chicken breasts with a fork a few times so that some of the marinade can penetrate the inside of the chicken breasts. Cover the bowl with plastic wrap and refrigerate until ready to cook. I usually take the chicken and marinade out of the refrigerator about 30 minutes before I begin cooking. I like to bring it closer to room temperature before putting it on a hot grill pan.

2. Lightly oil a grill pan with olive oil and set on medium heat. Grill chicken breasts for 5-6 minutes on each side. Adjust the cooking time depending on how thick the chicken is.

Sunday, February 27, 2011

Tofu and Black Bean Chili

In the winter, there is nothing I love more than a big bowl of hot chili. Here is my recipe for Tofu and Black Bean Chili. I made a vegetarian version, because I had a package of tofu that I needed to use. But, feel free to swap out the tofu with ground beef or ground turkey. When it comes to the beans I personally prefer black beans or pinto beans, but you can probably add kidney beans if that's your preference. You can adjust the seasoning as much as you want to make it as spicy or mild as you wish.

Ingredients:
olive oil
1/2 large onion, diced
1 14-ounce package of extra firm tofu, diced
1 1/2 tablespoons chili powder
1 1/2 tablespoons cumin
1 tablespoon garlic powder
1/2 teaspoon crushed red pepper flakes
salt
pepper
1 can (15 ounces) black beans, drained and rinsed
1 can (14.5 ounces) diced tomatoes
water
optional toppings: cheese, sour cream, chives, onions, etc.

Directions:
1. In a medium saucepan over medium heat, saute onions in a good splash of olive oil until the onions begin to soften. Add the tofu and saute with the onions for 5-10 minutes.

2. Add the chili powder, cumin, garlic powder, crushed red pepper, salt, and pepper. Toss with the tofu and onions.

3. Add the black beans and tomatoes and stir everything together. Add as much water as you like. I like my chili on the watery/soupy side, so I tend to add more water. If you like your chili thicker, add less water. Taste and adjust seasoning as necessary.

4. Bring chili to a boil then cover and reduce heat to low. Let the chili simmer, stirring occasionally, for about 30-45 minutes.

5. Serve and top with your favorite toppings.

Saturday, February 19, 2011

Thai Noodles

At work we have a small Food Club, and each week two coworkers bring in treats for the club. This week, one of my coworkers brought in Thai Noodles. I thought it was so delicious that I asked her for the recipe and made the dish for myself tonight. The recipe is originally from Ina Garten and she calls it Crunchy Noodle Salad. I'll just keep it simple and call it Thai Noodles. I made a few adjustments based on what I like and what I wanted. The original recipe was really heavy on the oil, so I reduced it. The dish was still too oily for me, so I halved the amount of oil in my recipe here. Next time I make it, I might reduce it even more and maybe try a different oil, like olive oil. I think the best thing to do is to just add the oil gradually. The great thing about this dish is that it can be served both warm and cold; I prefer it warm.

Ingredients:
1/2 cup smooth/creamy peanut butter
1 garlic clove, minced
1 teaspoon ginger, dried or freshly grated
1 tablespoon honey
1/4 cup rice wine vinegar
1/3 cup soy sauce
3 tablespoons sesame oil
1 teaspoon chili paste (Sambal Oelek), or more to taste
1/2 cup vegetable oil, more as needed
3 tablespoons toasted white sesame seeds, divided
1/2 pound spaghetti
1 14-ounce block extra firm tofu, drained, pressed, and diced in cubes
1/2 pound sugar snap peas, ends removed, and cut in pieces
1 large or 2 medium red bell pepper, cored, ribs removed, and diced
4 scallions/green onions, sliced

Directions:
1. For the dressing, combine the peanut butter, garlic, ginger, honey, rice wine vinegar, sesame oil, chili paste, and vegetable oil, and 2 tablespoons of the sesame seeds in a medium bowl. Whisk until smooth. Taste, adjust seasoning if necessary, and set aside.

2. Bring a large pot of salted water to a boil. Add the spaghetti and cook according to package directions. Drain and set aside.

3. While the spaghetti is cooking, saute the tofu in a large skillet on medium heat with a bit of vegetable oil. Cook, tossing occasionally, until the tofu browns.

4. Combine the spaghetti, tofu, sugar snap peas, bell peppers, and scallions in a large bowl. Pour half of the dressing over the spaghetti mixture. Add the remaining 1 tablespoon of sesame seeds and toss everything together. Save the remaining dressing to top individual portions.

Sunday, February 13, 2011

Spaghetti with Cherry Tomatoes, Spinach, and Other Yummy Stuff

I once stumbled upon a recipe for Cherry Tomato Pine Nut Spaghetti at Vintage Victuals. Just from the pictures alone, the dish looked yummy, so I was determined to try it out.

For the most part, I followed the recipe fairly closely and improvised when I had to. Instead of panko breadcrumbs, I just had plain breadcrumbs on hand. I didn't have Italian seasoning, so I just used oregano and basil. I altered the measurements on somethings and other things I didn't measure at all.

Here is my recipe, inspired by Vintage Victuals.

Ingredients:
1/3 cup pine nuts
1/4 cup plain breadcrumbs
garlic powder
olive oil - I just splash it in and don't measure it
1 tub (10.5 oz.) cherry tomatoes
2 cloves of garlic, sliced
dried oregano
dried basil
salt and pepper
whole wheat spaghetti
1-2 handfuls baby spinach
feta cheese, crumbled
Parmesan cheese

Directions:
1. Toast pine nuts in a dry, non-stick skillet on low heat until fragrant.

2. In a large skillet on medium heat, add the breadcrumbs, garlic powder, and a splash of olive oil. Toss together until the breadcrumbs are lightly toasted. Set aside.

3. In the same skillet, add another good splash of olive oil. Add the cherry tomatoes and cook, stirring occasionally, until the tomatoes start to get wrinkly and release a little bit of their juice.


4. Add the garlic, oregano, basil, salt, and pepper. Add a smidge more olive oil if you think the mixture and pan might be a bit too dry. Reduce the heat to low, and let the tomato mixture simmer.

5. Cook the spaghetti according to package directions.

6. When the spaghetti has about 4-5 more minutes of cooking time, add the spinach to the tomato mixture and toss gently. We just want to warm and wilt the spinach. By this time the tomatoes might get fragile and might squish or break apart. This is OK because they'll release more juice.


7. When spaghetti has finished cooking, reserve a few cups of the pasta water in case you need to thin out the pasta later. (I didn't do this when I made the dish tonight but wish I had and that's why I'm adding the instruction here.) Drain the spaghetti and add it to the tomatoes and spinach. Add the breadcrumbs, toasted pine nuts, and feta cheese, and toss the whole thing together. If you think the dish looks a little too dry, gradually add the reserved pasta liquid until it looks or feels right to you. (Yes, I realize that these are vague directions, but, for me, my cooking methods are often based on look, feel, and smell. It's not sophisticated, but somehow it works.)

8. Dish it out and top with Parmesan cheese.


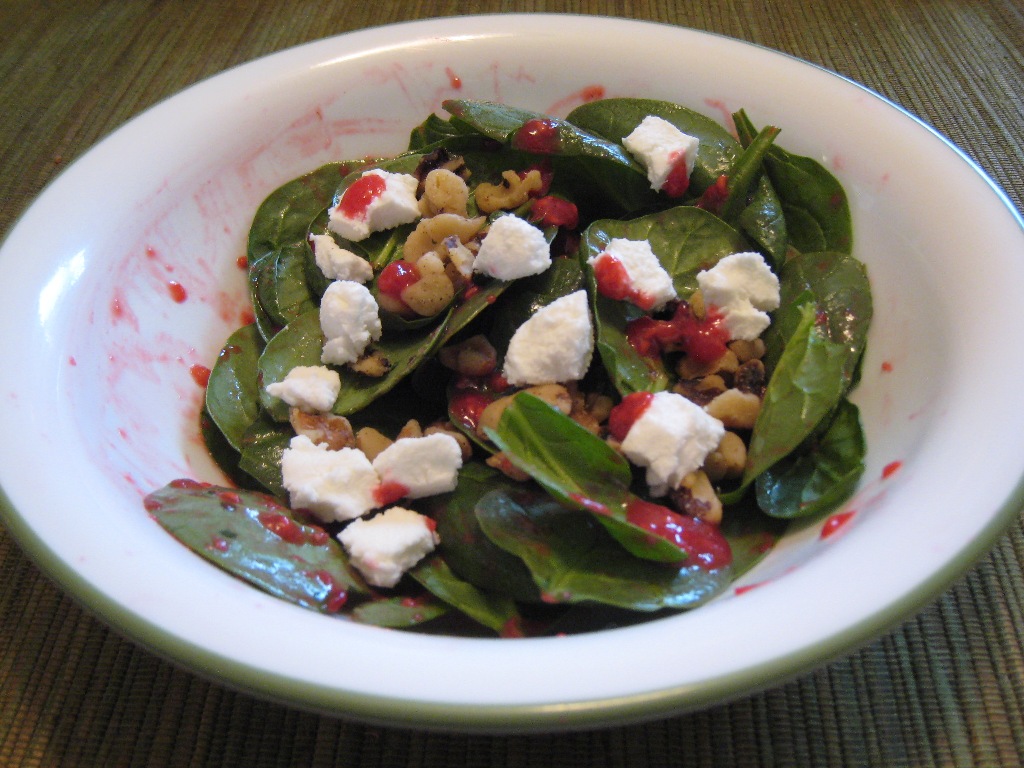
I realize that these aren't the greatest photos and the last one especially is a smidge blurry. But, trust me, the dish tasted wonderful!

Penne with Tomatoes, Spinach, and Cannellini Beans

I found the recipe on MyRecipes.com and on the site the recipe was called Greek Pasta with Tomatoes and White Beans. I suppose the fact that the recipe includes feta cheese and spinach makes it somewhat Greek. But, even with my love of all things Greek, I'll just refer to my recipe by simpler terms. And as is becoming typical of my cooking, I improvised here and there and didn't do a whole lot of official measuring. And because I usually cook for just myself and not 4-6 people, I halved the recipe. So here is what I did...

Ingredients:
Olive oil
2 cloves garlic, minced
1/2 small onion or shallot, diced
1 can diced tomatoes
1/2 can cannellini (white kidney) beans, drained and rinsed
Salt
Freshly ground pepper
Dried oregano
Dried basil
Penne pasta
2-3 handfulls of baby spinach
Feta cheese
Parmesean cheese

Directions:
1. In a large skillet over medium heat, saute onions and garlic in olive oil for about 3 minutes.

2. Add tomatoes and beans and season with salt, pepper, oregano, and basil. Bring to a slight boil, then reduce heat and simmer.


3. Cook pasta according to package directions.

4. When the pasta has about 2-3 more minutes of cooking time, add the spinach to the tomato sauce.

5. Drain pasta and dish sauce over it. Top with feta and parmesean cheese.


Cooking Tip: Whenever I'm seasoning dishes like this, I always go really light on the salt because you'll get a little bit of saltiness from the cheese that you add later. There also tends to be higher sodium levels in canned tomatoes and beans. Whenever possible, try to look for kinds that are low sodium or have no salt added. If the dish isn't salty enough for you when you start eating, you can always add more as you see fit—or better yet add more cheese. You can always add salt later but you can never really take it away once it's there, so go easy in the beginning.

Tofu Fajitas

I'm not a vegetarian or a vegan; I'm an omnivore. But I have a lot of friends who are vegetarian and a few friends who are vegan, so I consider myself fairly informed and very open-minded on the subject. Among my many other cooking adventures and experiments, one of my latest tests is to see if I can put a vegetarian twist on some of my favorite dishes. I love Fajitas, so I thought I'd make them vegetarian by replacing the chicken or beef with tofu. This dish is also made simpler and easier by using a prepackaged seasoning mix.

Ingredients:
1 14-ounce package extra-firm tofu, cut into strips
1 large onion, sliced
2 medium red or orange bell peppers, seeds and ribs removed, cut in strips
4 tablespoons olive oil, and more as needed
1 package McCormick Fajita Seasoning Mix
1/4 cup water, and more as needed
Flour tortillas
Optional toppings: shredded cheddar cheese, sour cream, salsa, guacamole, etc.

Directions:
1. Drain the tofu and slice lengthwise in 1/2-inch slices. You should be able to get about 6 slices. If desired, press tofu for 30 to 40 minutes (see Pressing Tofu tip below). Cut sliced tofu into strips. You should be able to get about 4 strips per slice.

2. Heat 2 non-stick skillets on medium heat with olive oil. About 2 tablespoons in each pan should do. Place tofu in one pan and the onions and peppers in the other pan. Toss each to coat the tofu and onions and peppers evenly in the oil. If the pans seem too dry, add more oil as needed. Cook each for 3 to 5 minutes, tossing each mixture occasionally.

3. Add half of the fajita seasoning mix with the tofu and the other half with the onions and peppers. Toss to coat evenly. Add water to the pan with the onions and pepper. Continue cooking, tossing occasionally, about 3 to 5 minutes or until tofu starts to look golden and onions and peppers start to soften.

4. Add tofu to onions and peppers and toss everything together. Reduce heat to low and let simmer for another 5 minutes, tossing occasionally. If the pan seems too dry, add a bit more water.

5. Serve in tortillas and topped with any toppings of your choice.


Pressing Tofu: A lot of recipes in many cookbooks call for pressing tofu. Tofu is often packed in water and it retains a lot of that moisture. When you press the tofu and release some of the moisture, the tofu can then absorb more flavor. My mom cooked many dishes with tofu and I don't think she ever pressed her tofu, and every dish turned out just fine and full of flavor. But here I'll add pressing tofu as an optional step whenever I use it. Here is what I do for this particular recipe.

Place 2 or 3 sheets of paper towel on a baking sheet and place tofu slices on the paper towel. Put another 2 or 3 sheets of paper towel on top of the tofu slices, place another baking sheet on top of the tofu and paper towel layer, and weigh down the top baking sheet with a few cans of soup, veggies, or whatever.

Thursday, February 10, 2011

New Food Blog

Here I am, beginning yet another blog. If you look at the sidebar to the left, you'll see a section titled "More from Tenth Muse." All of the blogs under that header belong to me. I have my "regular" blog, Vivamus atque Amemus, in which I talk about the mundane things going on in my life. I have my poetry blog, The Voice of the Muse, in which I share a lot of bad poetry. And I have my photography blog, Eyes of the Muse, in which I share my photos.

With all of these blogs, you might wonder why I need a new one. Well, why not? Two of my hobbies are writing and photography, so I have special blogs dedicated to them. Why not have a special blog devoted to another one of my hobbies—food, cooking, and eating.

This blog will be all about food, the ambrosia and nectar that make the Muse happy. I'll share some of my general thoughts about food and I'll share many of the recipes from my Cooking Adventures. I hope you stick around and I hope you'll enjoy what's to come.

Proost!